Skateboard Wheel – gas pedal

posted by:  andy burger, march 28, 2020

when two hobbies meet - skateboard wheel as accelerator pedal...

if you have ever driven a VW based vehicle with a “roller pedal” for the gas pedal, you have a good understanding on how easy and good feeling that can be in lieu of a standard upright pedal.  

its definitely something you have to get used to but once you do you realize that you had been missing out for years until you tried a roller for the first time.   well, here is a way to even make that experience more pleasurable – replace that stock hard plastic or aluminum roller pedal with a skateboard wheel, a soft rubber wheel that feels perfect and retains that comfortability of using a roller pedal.  below is a stock roller pedal assembly and what it “looked like on my buggy” initially.

replacing that hard plastic or aluminum roller pedal ended up like this
so how did we get here?  easy, simply remove the existing roller ball with a single nut on the right side and acquire the following and follow the directions as indicated…. thats it 🙂 

note:  if you don’t have access to bearing washers or spacers, you can click this link to Amazon and order what you need – cheap and you’ll have some spares too.

the skateboard wheel is so comfortable on your barefoot or driving shoes, sandals, etc.  if you get a soft durometer skateboard wheel, softer than 85A, you will have a nice feel and smooth bearings – you can drive with your big toe even simply rolling down and up on the wheel itself.  you’ll have less leg stress in longer distances and you’ll find out that you should have done this years and years ago.  enjoy !!!

about this dune buggy

What you are seeing is a dune buggy known as a Zarkov.  “What is a Zarkov”?  Well, that’s easy.  Dr. Hans Zarkov (aka Joseph Wheeler) from West Virginia, is arguably one of the best fabricators, fiberglass-men, paint, and mechanics to ever build a dune buggy.  This one-of-a-kind buggy was Number 5 (commissioned in 2012) in Joe’s buggy build history.  And to this day, 20 other Zarkov’s are in existence. 

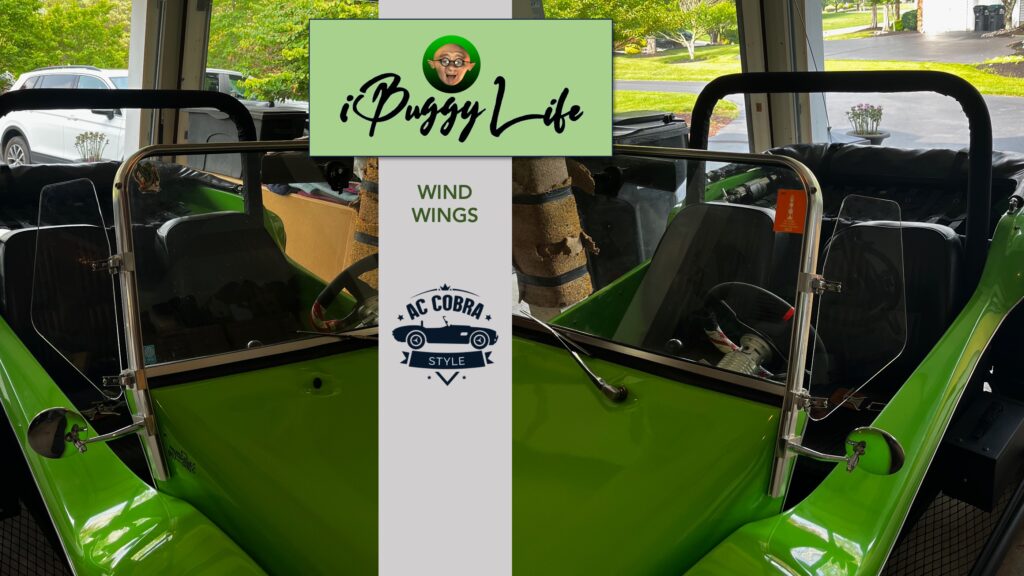
WIND WINGS “Cobra Style”

posted by:  andy burger, january 19, 2024
“Dad would have been 99 today” 

an addition you don't think you'll
need but then never live without...

Adding wind wings to a dune buggy – to the purist – changes the lines of the intent of the buggy design and style of the 60’s.  However, these are subjective comments only.  Its not until you ride in a buggy with proper wind wings that you notice a HUGE difference in the wind in the buggy drivers/passenger area “or lack thereof” – its also a nice to have a quieter inside, for better music acoustics and/or to have a conversation or two when riding with a passenger.  

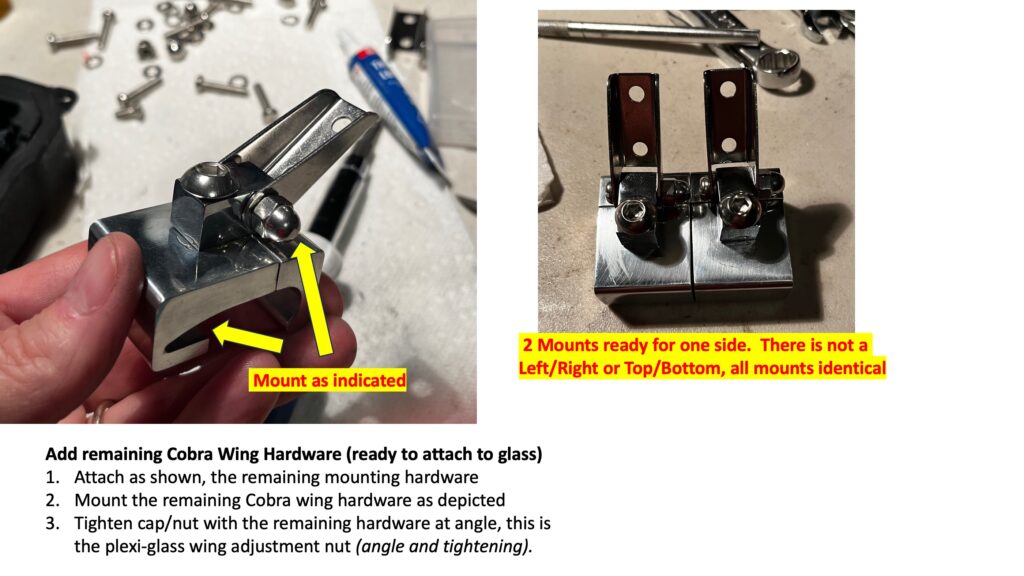
My goal to adapt/design these “off the shelf” wind wings was two fold;  1. properly create a solution that worked well with the overall design of the buggy and provide wind dampening, and 2. also make them as easy as I could to mass produce or build these for others with just a little bit of tweaking.  So after the 6th set I’ve made, I wanted to share to everyone the “how to” and “where to acquire the stuff” to do it yourself.   Enjoy and keep fishing.

Wind Wings Parts List: Shelby Cobra Style

About $200 total hardware for a set of these wings:

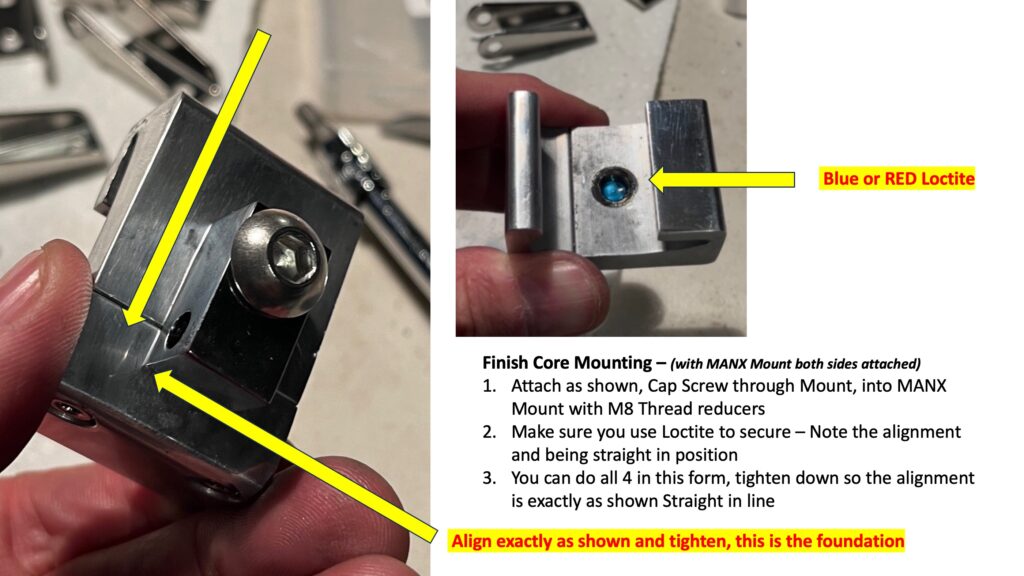
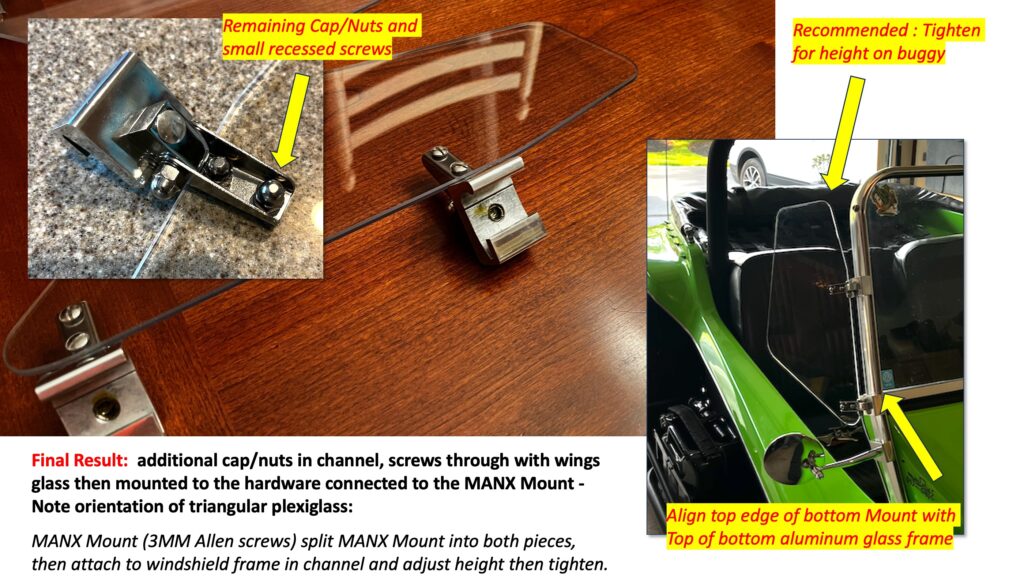
The thread reducers are CRITICAL – they come from China though and will take the longest to receive, but they are a tad too long, you’ll need to use a Dremel and cut about 2 to 3mm (or 2 or 3 threads) from the bottom of them, so they fit within the thickness of the MANX Mount not sticking out of the top or bottom. 

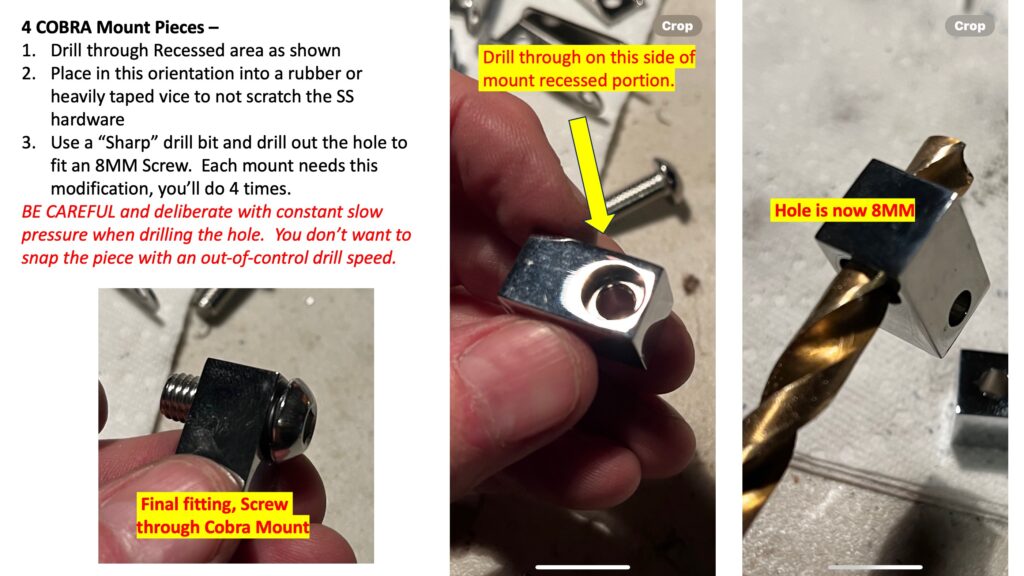
Another critical modification is that you need to drill out the small hole in the Cobra wing mount to M8 Size to have the screw go through the mounting portion into the MANX windshield mount with the thread reduced to M8, use Loctite as well on the reducer and on the screw into the reducer.  They shouldn’t loosen and are not needed for adjustment.

Drilling the hole to M8 size is the task – if you have a vice, make sure the inner teeth are rubber coated/protected/or thick taped so to not scratch the Cobra SS Mount to hold securely when drilling out.  The drill needs to go through that existing hole to make larger to M8 size so the button head screw can go through. 

Nothing is truly plug and play or off the shelf when adding things to a dune buggy.  Just about everything requires some modification to adapt.   I tried to make this easy with home tools that anyone could attempt.   Good Luck and/or send me a note if you have any questions.

about this dune buggy

What you are seeing is a dune buggy known as a Zarkov.  “What is a Zarkov”?  Well, that’s easy.  Dr. Hans Zarkov (aka Joseph Wheeler) from West Virginia, is arguably one of the best fabricators, fiberglass-men, paint, and mechanics to ever build a dune buggy.  This one-of-a-kind buggy was Number 5 (commissioned in 2012) in Joe’s buggy build history.  And to this day, 20 other Zarkov’s are in existence. 

Slow Grilled Wing Dingers

posted by:  andy burger, october 30, 2022

the easiest and most consistent game day slow cooked chicken wingers you can make – but takes time and love, care and affection on the grillb 🙂   an easy sauce recipe below as well.  

Slow Cooked Wing Dingers

head to your local BJ’s, Costco, or grocery store and buy a bag of frozen wings (Already sectioned) – or your grocery store wings and section when you get home.   thaw wings fully if frozen.  

Takes about an hour –

1.     A bag of frozen sectioned chicken wings, or grocery store wings, just section them….If Frozen, thaw first.
2.     Toss Wing sections in large bowl with Extra Virgin Olive Oil. 
3.     Liberally coat the wings with 25 % Kosher Salt and 75 % Lemmon Pepper spice – liberally.
4.     Pre-Heat Grill with non-stick – Medium Heat only, Error on the low temp side.
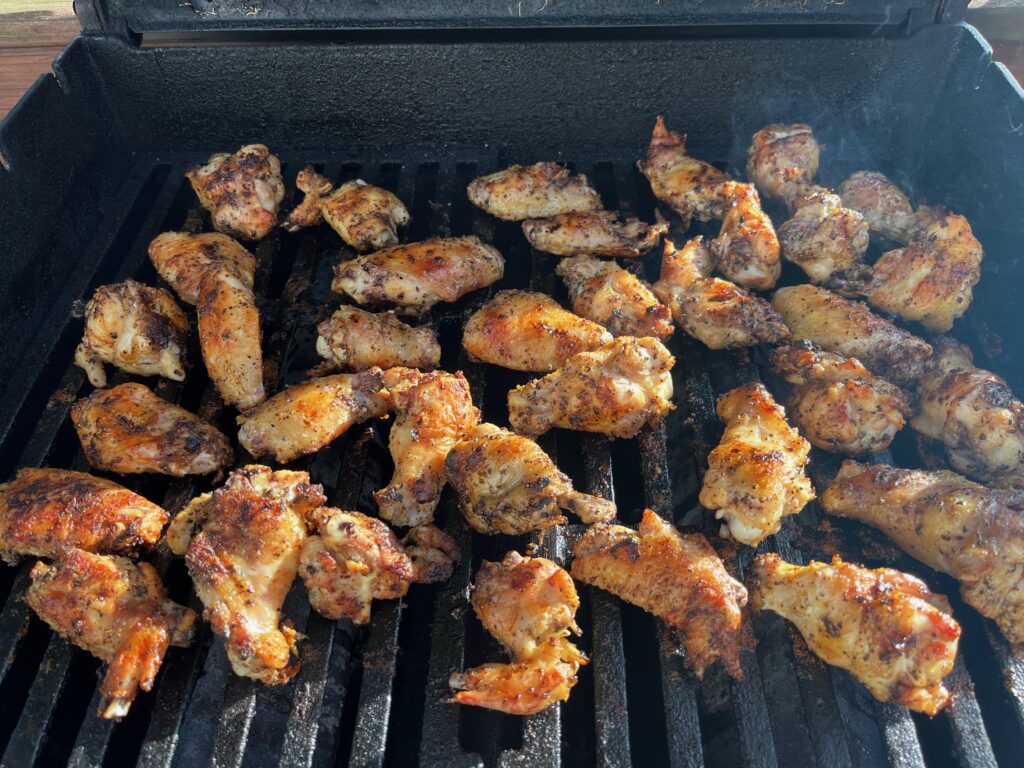
5.     Place wings spaced on grill grates
6.     Turn wings every 5 minutes regardless – keep turning to get evenly brown.  If you have hot spots on your grill, move wings cooking quicker around and get all of the wings cooked evenly.
7.     You will cook the wings on Medium -Low heat for about 45 minutes or 8 to 10 turns
8.     The wing meat will start to separate from the bones, they will start getting crispy
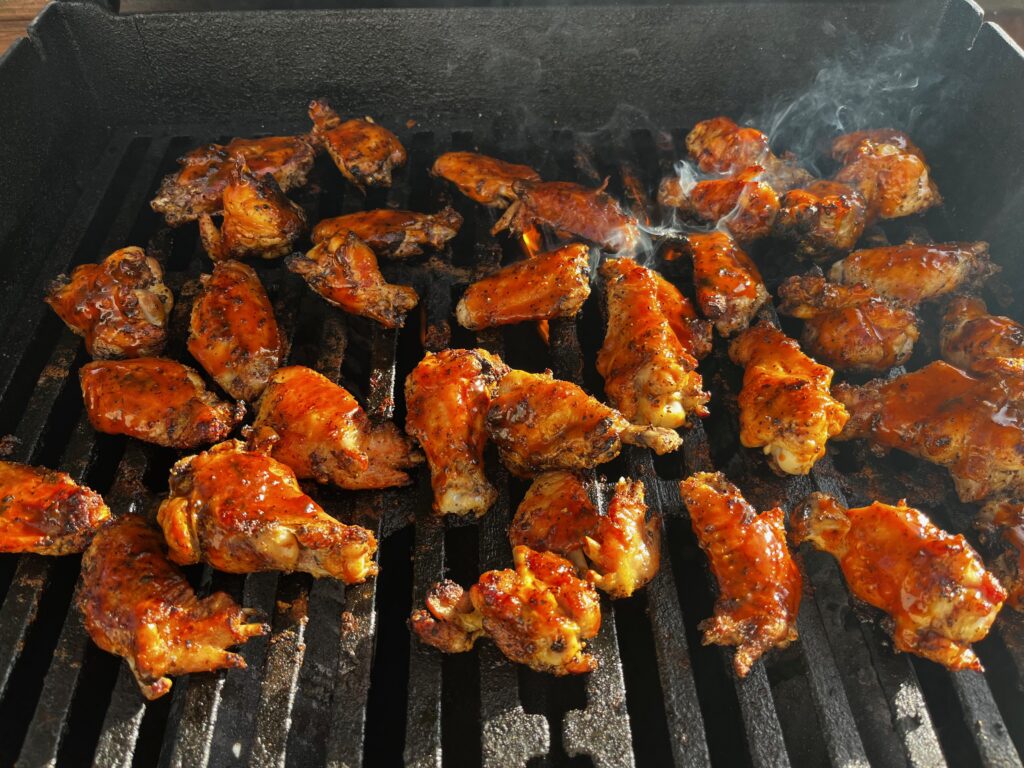
9.     Brush on your BBQ/Wing Mixture all over the wings and – ONLY COOK for 5 minutes longer.  The web sauce will burn quickly once on the hot grill grates that have been on for almost an hour.

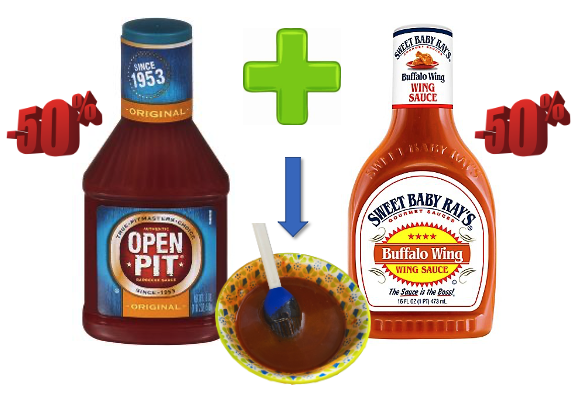
BBQ Wing Mixture.  Easy-Peacey and no fuss.  ½ cheap Open Pit BBQ sauce – ½ Sweet Baby Rays Wing Sauce. 

Enjoy the Step By Step Photos

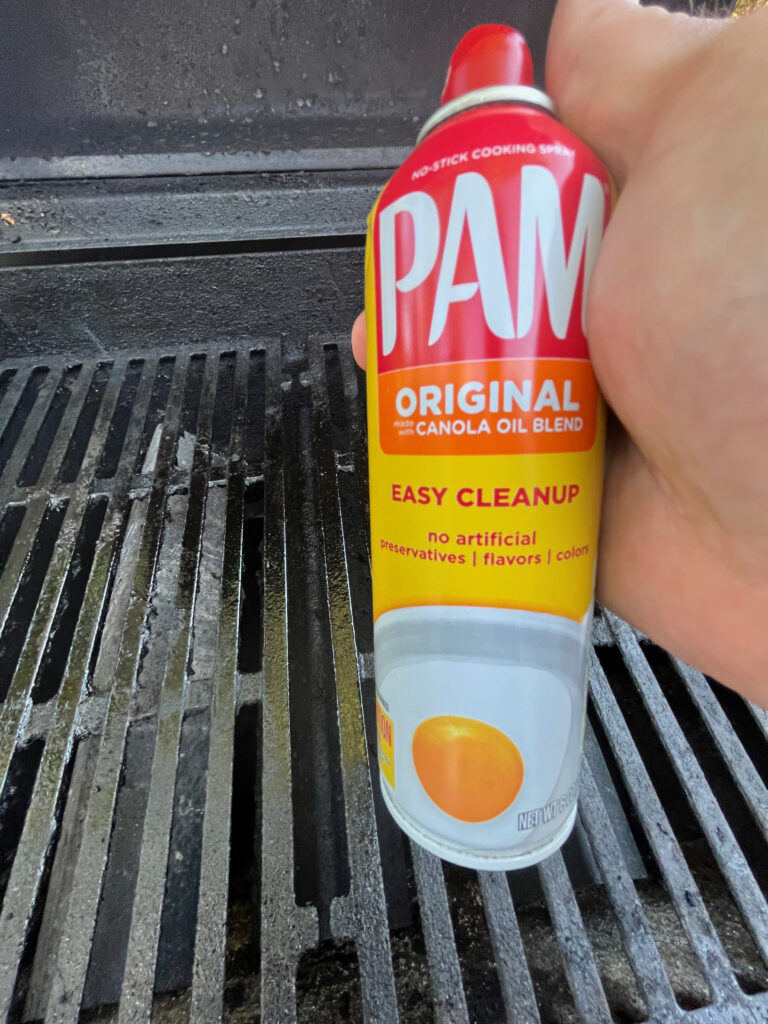
Step 1 - pre-heat (MEDIUM Heat)Grill and spray with a LOT of non-stick
Step 2: Assemble Ingredients: Bag of Frozen Chicken Wings (Thawed)
Step 3 - Coat with Salt / Lemon Pepper Mix
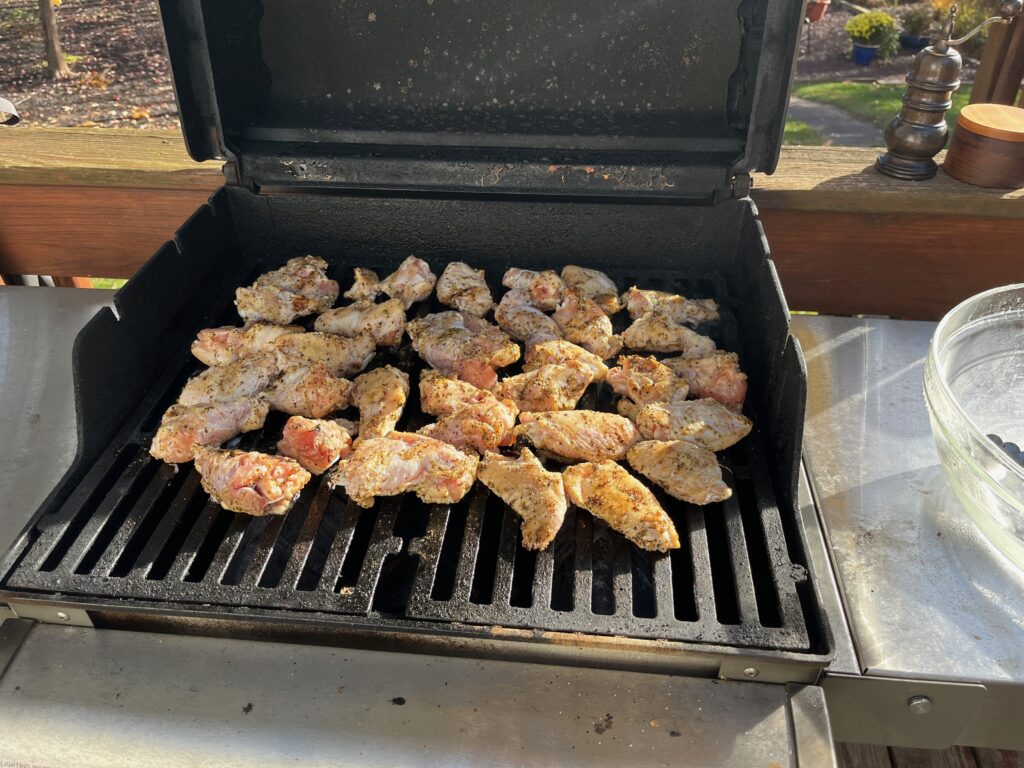
Step 4 - After coating with EVO / Salt / Lemon Pepper, put on pre-heated grill
Step 5 - Turn Wings Each 5 minutes regardless (45-50 minutes total)
Step 6 - Mix Open Pit and Wing Sauce 50/50
Step 7 - Coat with BBQ/Wing Mixture, cook 5 minutes longer only.

The Outer Banks Less Traveled

posted by:  andy burger, august, 2022

The Outer Banks Less Traveled

What it takes to drive your off-road vehicle on the beach areas.
Overview of Beach Driving & ORV "Off-Road-Vehicle" areas

I first drove my dune buggy on the beaches in the Outer Banks in 2017 in Corolla / Carova – the northern most parts of the Outer Banks in North Carolina.  I was hooked – absolutely hooked and immediately afterwards, completely changed my dune buggy setup to be more off-road in nature for my next visit which came quick 🙂   I have been to the Outer Banks many many times since driving on beach areas in Corolla all the way North on beach Highway 12 to the Virginia border and back.  I have driven in the sand bowls behind the beaches in Corolla and to the top of Penny’s Hill a couple of times.  Some of my most memorable experiences in my dune buggy is driving in Corolla when the time is simply perfect, the weather is amazing, and my wife is with me.

However, as everyone knows, when you stay in Nags Head, Kill Devil Hills, etc. getting a quick trip to beach drive in Corolla is a time-consuming planned event.  It takes a while, 45 minutes at least and that’s generous, to make it to the 4×4 area and you are totally dependent on “tides”, you can NOT be driving on that beach area when high tide conditions or near high tide conditions exist.  In 2021 we spent a week in Corolla in a rented house about ¼” mile from the 4×4 entrance and were able to experience that area in the buggy every day when the tides were good. 

But, In October of 2020. I was introduced to driving my dune buggy on the ORV – “Off Road Vehicle” areas/sand in the Outer Banks.  A Paid “Cape Hatteras National Seashore Off-Road-Vehicle permit” is required for driving on the beaches below Nags Head.  This opens an entirely different experience for vacationing possibilities.  While staying in Nags Head, KDH, with an ORV pass, your first area to enter the beach is less than 20 minutes away at Coquina Beach.

Understanding Ocean Tides

Why are tides important…. An avid boater for my adult life on intracoastal, bay and sound areas as well as the Atlantic ocean, knowing how much water your boat drafts (how deep in the water is your hull under a normal fuel/passenger load) dictates where you can navigate outside of normal boating channels.  When its high tide, you can go more places than when its low tide, but understanding tide conditions and tide swing is key in not grounding out your boat bottom and/or destroying a prop.  It’s always better to boat during high tides, more water to navigate and boating areas are deeper. 

But, for driving on the beach, It’s just the opposite (you want to look for lower tide conditions), in low tides, the Ocean is lower, farther out and usually less currents, exposing more of the beach area – during low tide times (you’ll experience better driving, more beach area, more hard pack sand) – but my most important statistic is to watch is the “Tide Swing” range between high and low tides of the ocean height.  On each tide chart you look at, it will display the height of the tide next to the time it occurs.  The distance between the low tide height and the high tide height is the “Tide Swing” for that specific day.  The higher the tide swing, the more higher the ocean rises during high tide conditions.

Knowing the Outer Banks Geography and Driving

The geographic uniqueness of the Outer Banks, North of Hatteras is primarily the Atlantic currents, South of Hatteras is primarily the Gulf currents – and that makes a difference.  The tide swing in the northern part of the Outer Banks averages about 4 feet every day can be up to 5 feet at times.  This means that the difference between low tide and high tide can be 5 feet of Ocean and that 5 feet can sometimes go so high, that you can be locked out of the Corolla areas until the tides lower, less of the beach is exposed and you must drive in the top areas, deeper sand and ruts.   The moon condition, winds, and storms offshore affect this up and down as well sometimes a foot or more in swing.  

As you go farther south, not only does the beach areas get wider with more accessible area, but the Gulf current mixes more with the Atlantic waters, there are more sand shoals breaking up the waves off-shore – on the OBX chain at these areas the tide swing is lower as you go south.  It starts to be much less by the time you get to Oregon Inlet, then to Hatteras, then its lowest in Ocracoke.   I’ve seen tide swings on Ocracoke no more than 1 foot between high and low tides.  This means “Tides Really Don’t Matter” on many of the ORV areas from Oregon Inlet and to the south.   At the Coquina Beach access (Across from Bodie Light House), you can enter and drive to the end/tip of Oregon Inlet as your first experience in the ORV areas of the OBX.   Those beach areas are wider and the Oregon Inlet tide swings are usually about 2 feet from high to low – again ORV access on Oregon Inlet – “Tides Really Don’t Matter” when you get access to the area with your buggy, morning, mid-day, evening, night.   It’s always best to hit it on a lower tide time, but you can hit it at its highest and still have plenty of driving and sand to lounge in.  Again, in Corolla, you really can’t be out there at high tides ranges.

My experiences driving on the sand in the Outer Banks.  Air Down…. My personal experience (my personal experience and not a recommendation) in driving on all beach areas, I do NOT air down my front tires, I only air down my rears. I have larger tires (75 profile), and my air-down pressure is at 14 pounds and I’m good, but I drive with that air pressure all of the time anyway. If you have a lower profile tire (60 or less), suggest you air down rears to below 10 pounds. The national seashore services suggest “Air down don’t be a clown” 18 pounds or less.

Keeping in motion is key if you are in an unknown area, 5mph to 15mph you may never get out of second gear in a lot of places – keep your rpm’s above idle as much as you can and keep your front tires straighter on the sand long looping turns.  If you are stopped and need to turn, go straight first; trying to turn from a stopped position could bury your front tires into the sand…. but once you start off straight, get your momentum going then turn to get to where you are headed.  If needed, pass your turn, loop around and keep your momentum.  If you do have to come to a full stop, search out a flatter less soft sand area just to be safe. 

Of note, I’ve only been stuck in the sand driving, in Corolla in the top part deep ruts waiting on on-coming passing traffic when forced to be above the water line.  I’ve never been stuck in the ORV areas.  Again, I started driving in the ORV areas after I was much more comfortable, but I’ve noticed that the ORV areas are less chopped up than the Corolla areas not directly on the water line.  There are more cars chopping up the sand in Corolla than in the ORV areas.  There seems to be more top sand in the ORV areas, but its easily navigable.  As you get closer to the water line, it’s the same feeling as the best days in Corolla during low tides.  Navigating ORV areas, its raw, different, and new each time.

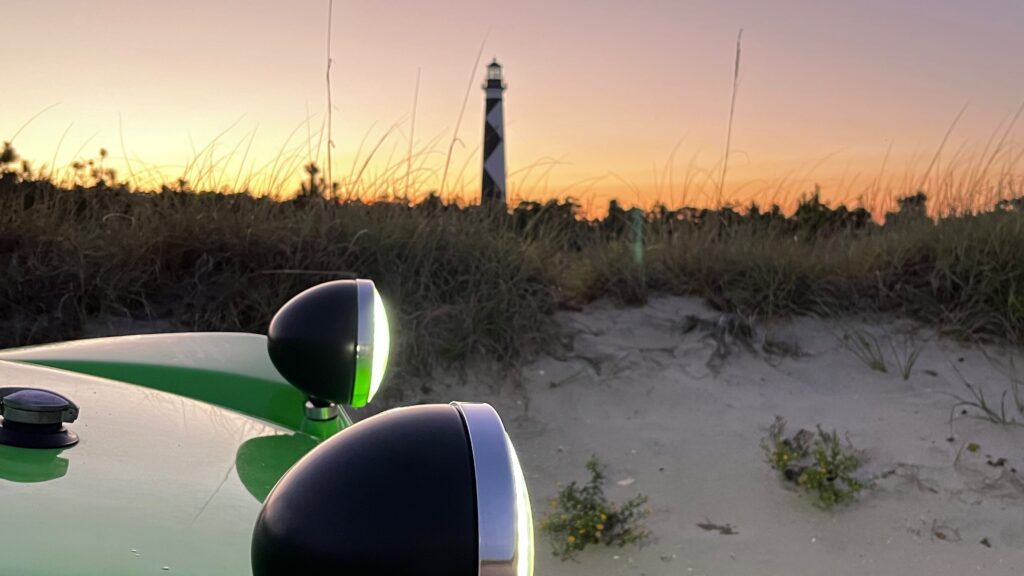
Heading South to Cape Lookout (the Outer Banks)

So, this year, a small group of us decided to travel to another island area on the OBX Chain south of Ocracoke.  Our goal was to see if this could sustain an organized buggy event for folks wanting to drive ORV the entire time.  We went to the Cape Lookout National Seashore.  Cape Lookout Island is two islands below Ocracoke, and roughly 25 miles long.  Only accessible by boat/car ferry, there are no stores, no paved roads, nothing but a beautiful area to visit.  We went when low tides were afternoons for the best experience-  it didn’t seem to matter, but what we found out was something so much more valuable….

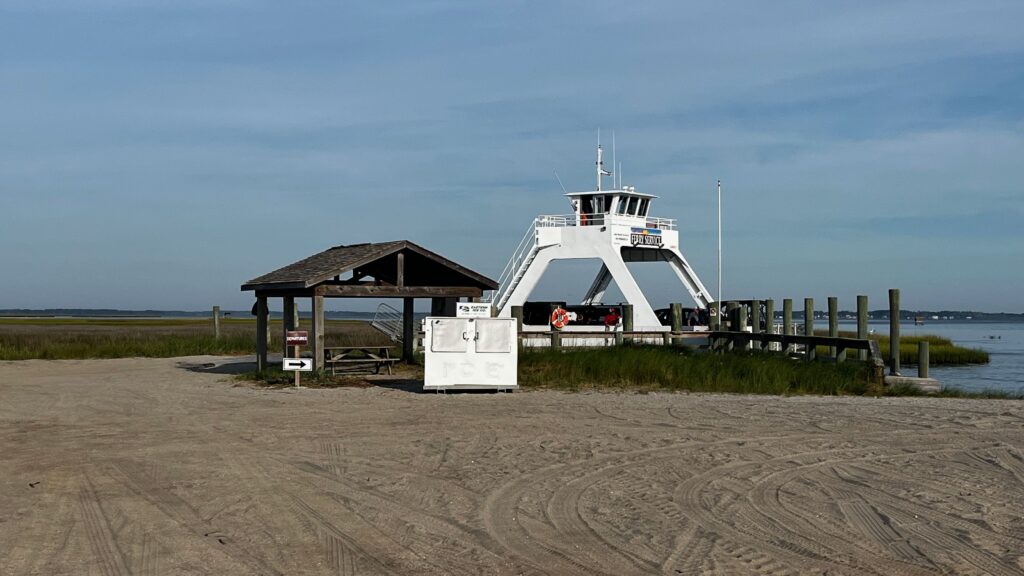
The trip started days before, but to get access to the Southern part of the Outer Banks and the Cape Lookout Island areas, we left the mainland from Davis, North Carolina.  At this launch point, there is a ferry from the Cape Lookout Camps and Cabins facility.  Here is where you rent your cabins (reservations in advance) as well as pay for your vehicle (length) and how many passengers you have going over to the island. 

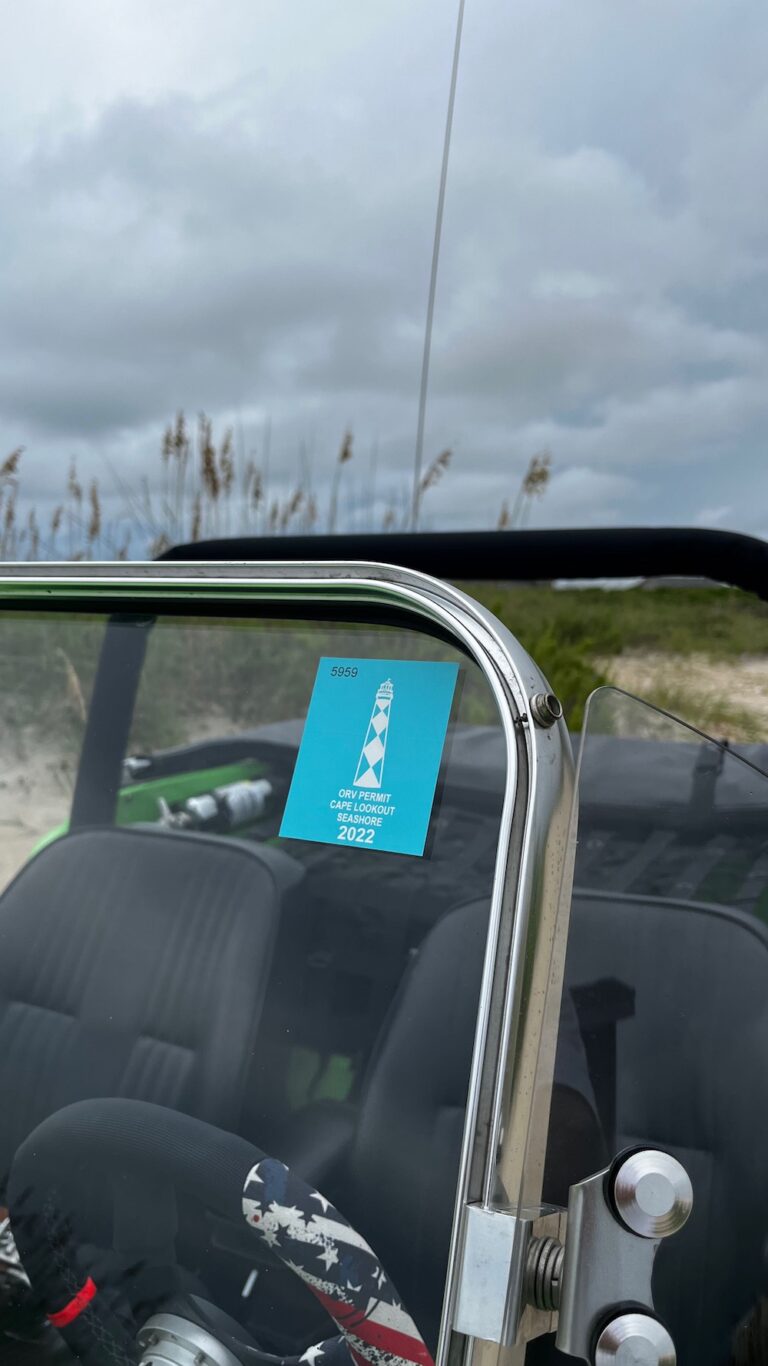
For our buggy and two passengers, the ferry and trip cost was $116 round trip and that included everything we could pack on top or in the buggy.  A cabin for the two of us (a cabin that could sleep 8 people), was $155 per night = $465.00 for the 3-night stay.   A $50 dollar Cape Lookout National Seashore Off Road Vehicle pass that is good from March 11th -December 31st completed the hard expenses.  Note, this pass is different than the Cape Hatteras pass that you buy from Ocracoke north.

As for driving on the ferry with all of our stuff, well, my wife walked onto the ferry because we had items packed in the passenger seat of the car, I drove onto the ferry and we were off on a 30 minute journey across the sound to the island.

What waits you on the island 🙂

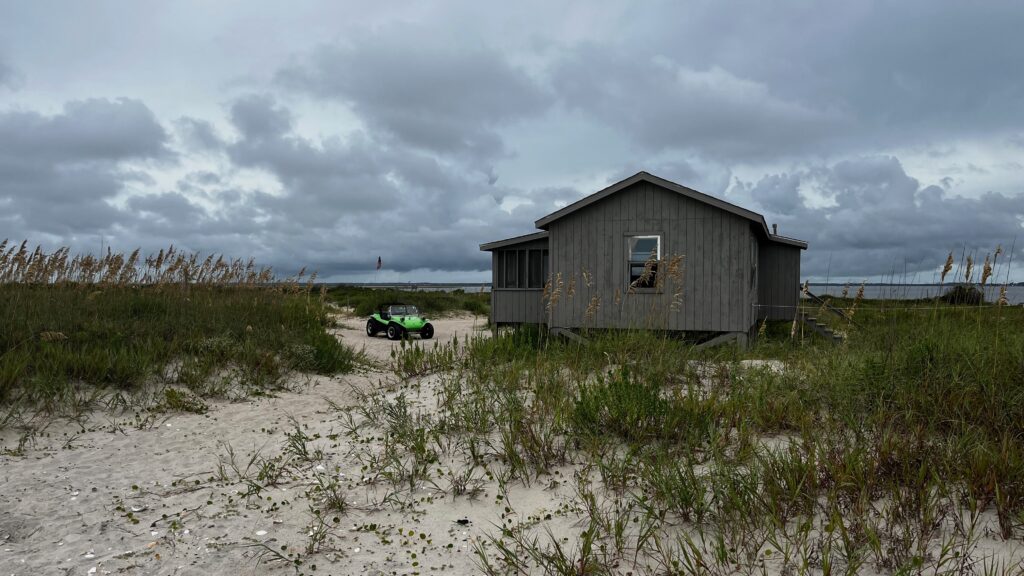
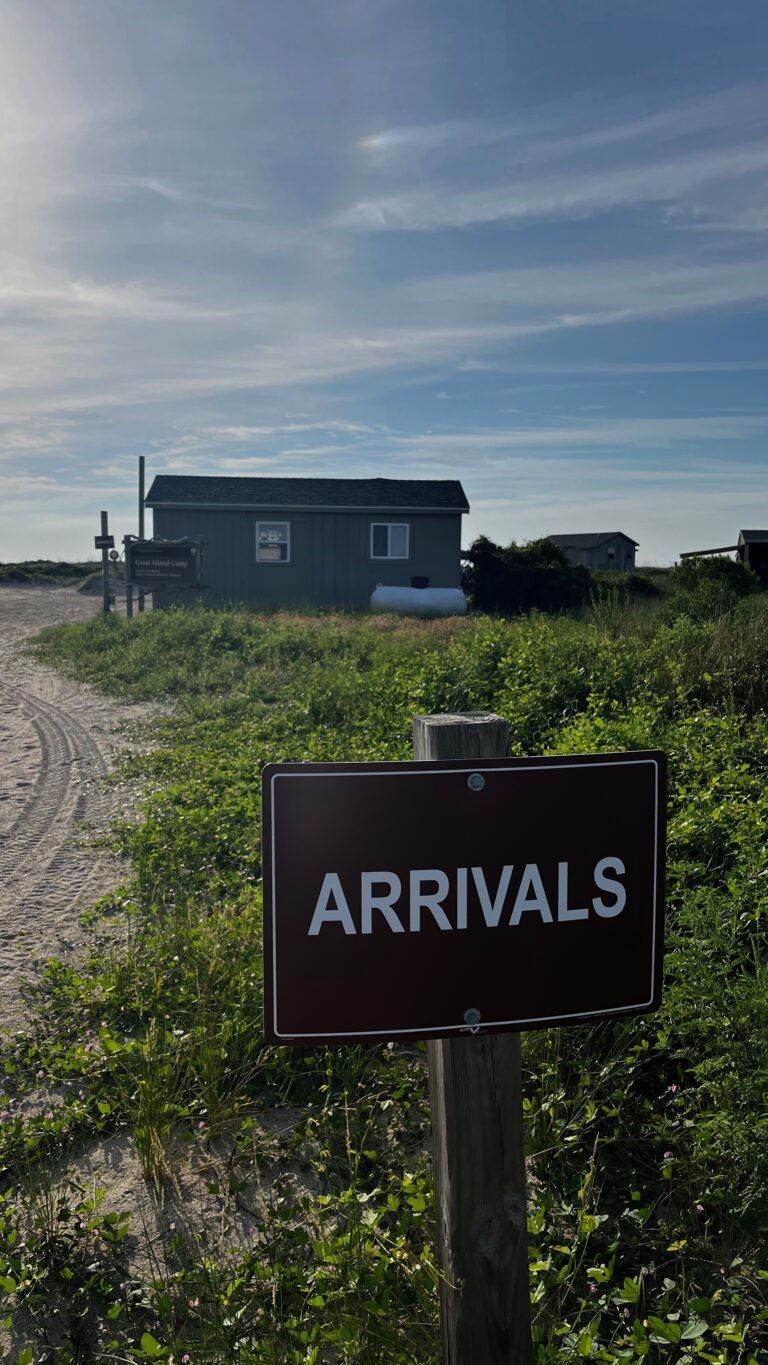
Departing the ferry and arriving to the check-in point on the island, you are greeted by park rangers at the entry way cabin.  This is like “main street” island.  A small building open 8am to 3pm with ice and fuel purchases if needed, trash/dumpster areas, etc. – Ice is critical each day.  But, here is where you show your receipt for the Off-Road-Vehicle pass that you purchased prior to arriving on the island and they affix a sticker to the top right of your windshield for the vehicle registered to be on the island.  You pick up your keys to the cabin you rented and off you go.  The roads on the island are all sand, but surface soft, there is hard pack dirt underneath and at no time did the buggy feel like it would be stuck.  You could stop and start whenever, with little wheel spin if any. 

Arriving to your cabin is just like pulling into any beach resort.  Each cabin has a small parking area, an outside grill and steps to a screened porch.  Upon entering your cabin, you note a sparse open area inclusive of the kitchen and sleeping area.  A single large room holding 4 bunk beds a large table and 8 fold up chairs.  A sink with hot/cold running water, propane stove and oven, kitchen counters, cabinets and shelves are there.  A separate bathroom with running water, sink/mirror/shelf, toilet, and stand up shower is adjacent to the kitchen.  There is NO Electricity, nor Refrigerator.   There are lots of windows in the cabin with screens – so you can open the windows and get the ocean breeze through the entire structure. 

For the 4 days / 3 nights, we took over 4 coolers with various food / beverage items packed solid with ice and that ice was refreshed each morning from the store area on the check-in point.  $3 dollars for a 10 pound block of ice, or $4 dollars for a 10 pound bag of cubed ice (payable only with credit card, no cash).

Cell phone service was active, ranged from the mainland still, 2 bars only, but you could make calls and access the internet if needed.

Unpacking and Relaxing

Immediately when you start to unpack, you notice a lot of flying and crawling bugs.  Get used to them.  But, there is a plan.  We took a bug fogger and bug spray with us, if you can find sunscreen with bug spray included, that will be good too. 

Prior to unpacking though we fogged the entire perimeter of the cabin, around the dune buggy, the porch area, and we sprayed the screens from the inside to the outside.  This most definitely is needed.  The bugs are alarming away from the ocean itself, but again, bug spray keeps them in check.  If you are a bug-phobic person, you’ll struggle.  However, by the end of the trip you may be feeding a crawling critter that you have come to love and admire 😊

But once you are ready to relax, literally walk 25 yards to the nicest beach you may experience in your lifetime.  You can’t drive direct from your cabin to the beach, but there are beach roads all over the cabin area that are ingress/egress points to take your buggy down to the water line.  

Packing up and Leaving Paradise

This is bittersweet.  You have come to enjoy no electricity, little to no phone service, the smell of bug spray, and no conveniences other than running water and Ice.  You pack up your garbage and drop it off to the bins at “main street” – pack up your buggy and meet the ferry to take you back to the mainland. 

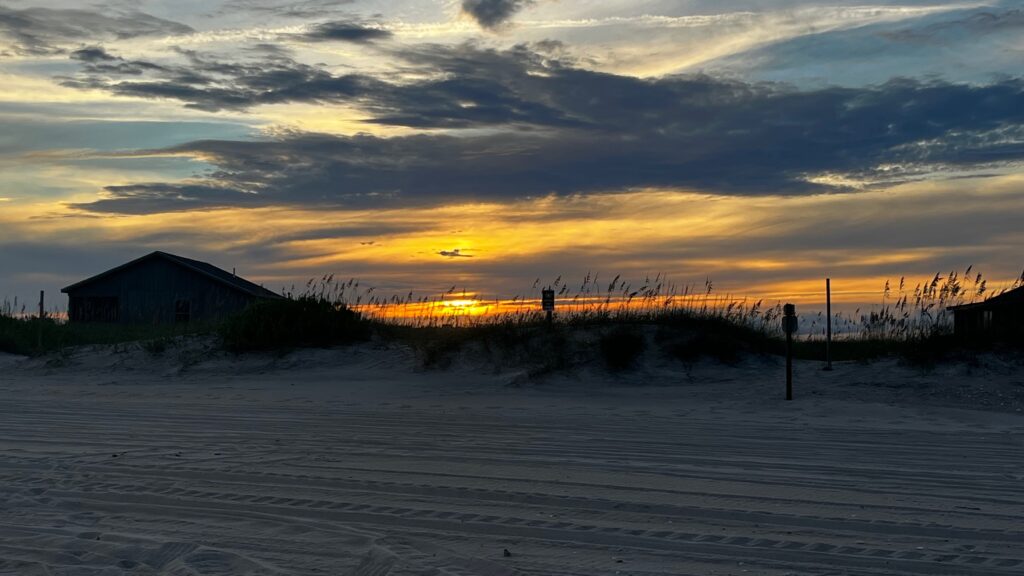
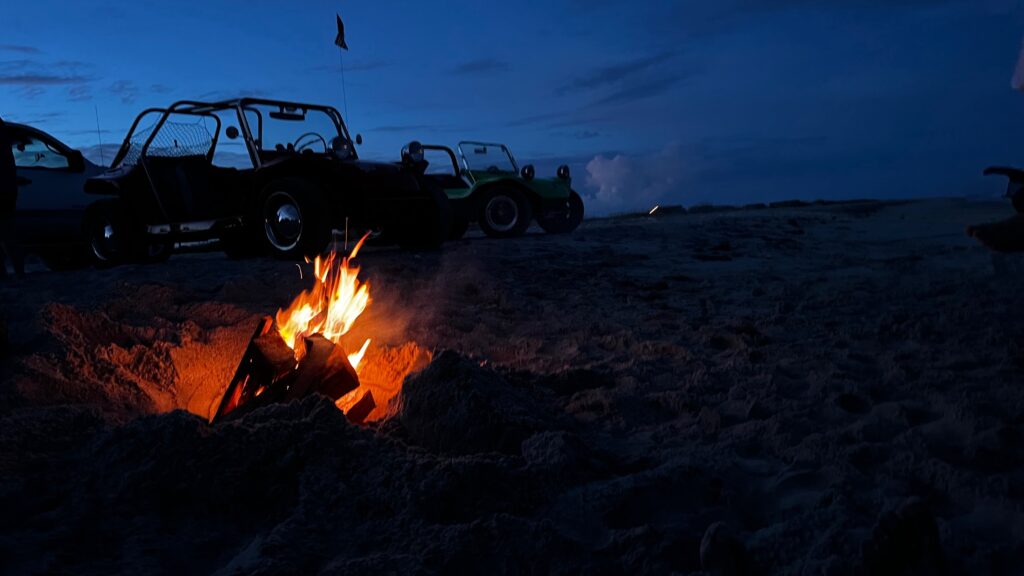
That’s about it.  For 4 days you have driven over 100 miles of pristine beach and sand roads, sit in the calmest warm ocean waters at the tip of the point at Cape Lookout, searched for sea shells, watched dolphins, sunrises and sunsets;  you have eaten every meal outside with friends, hung out with your dune buggy the entire time, burned a lot of firewood on the beach, and simply recharged your internal batteries.  Until next year.

GRILLED Steamed Dumplings

posted by:  andy burger, august 4, 2022

Do you like fried dumplings but don’t like the calories? Do you like steamed dumplings, but feel you are eating a mouthful of uncooked flour ?  Never say iBuggy wasn’t looking out for you – here we go 🙂

GRILLED STEAMED DUMPLINGS

Head to you local Chinese Restaurant and buy a couple orders of regular white kind of normal bland looking steamed mealy dumpling(s) order.  It doesn’t really matter how good they are – trust me the process will make them amazing.   Make sure you grab a bunch of dumpling sauce, at least one extra container per order (for options)
  • pre-heat your gas or charcoal grill to hot and spray coat lots with PAM or a non-stick
  • take the dumpling sauce they give you with the dumplings and add to bowl – (optional) add iBuggy extreme hot sauce, or any hot sauce in your cabinet to dumpling sauce
  • stir sauce (with or without hot sauce) and set aside
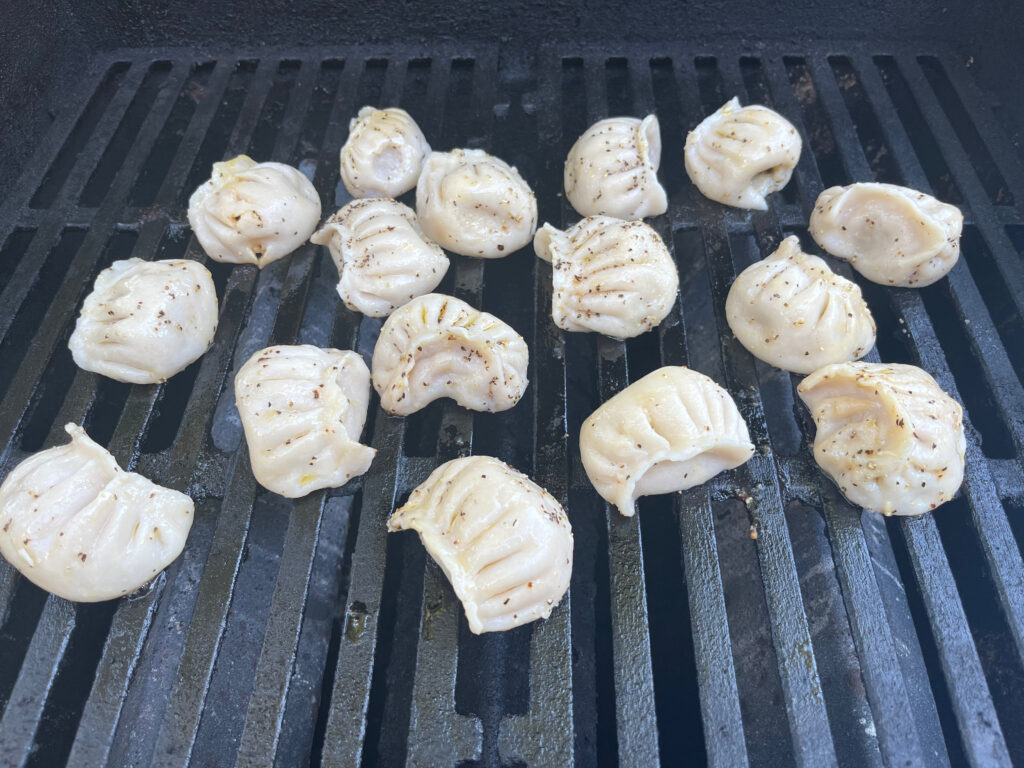
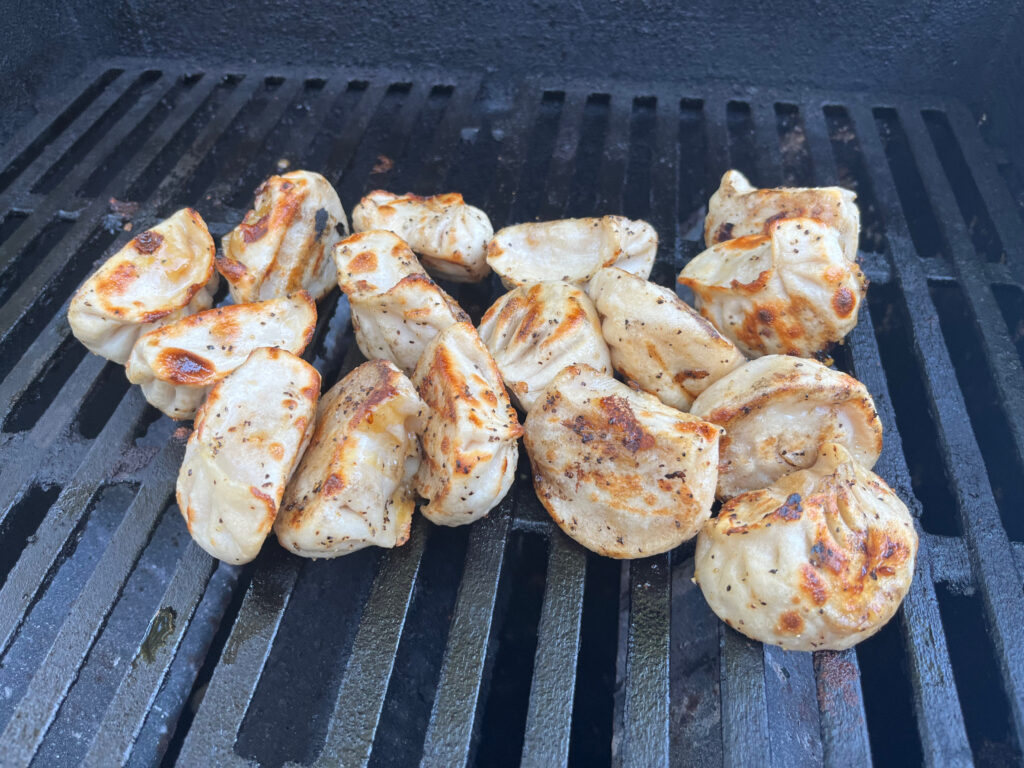
  • put dumplings into glass bowl and lightly coat with Extra Virgin Olive Oil and some salt and pepper, coat ensuring all sides of dumpling are covered
  • put your dumplings on the grates direct
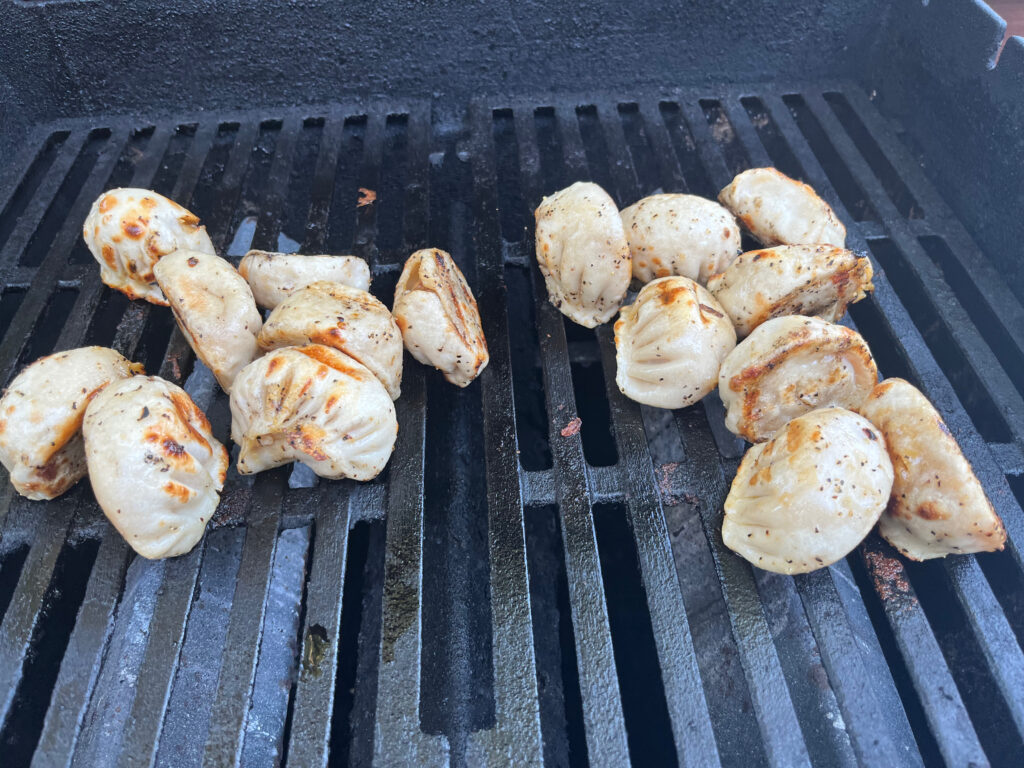
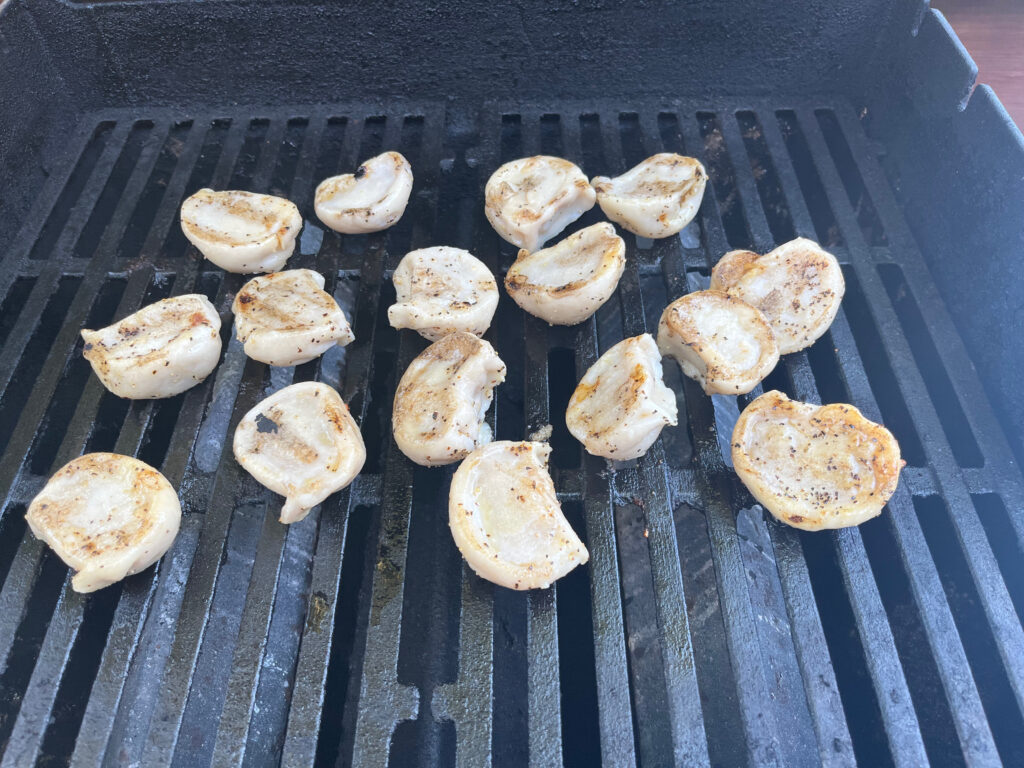
  • turn every minute, top/bottom/both sides, keep turning until golden brown
  • once done, put back into clean bowl
  • serve and eat with hot dumpling sauce or regular dumpling sauce or whatever 🙂
    Takes about 10 minutes start to finish – thank me the next time you see me.  By the way, they reheat perfectly the next day and are just like they came off the grill. Nuke for 30 seconds 😍

    Enjoy the Step By Step Photos

    Chinese Restaurant Order (Steamed Dumplings)
    Step 3 - Hot Sauce in Dumpling Sauce
    Step 6 - Dumplings on Grill (flat side down at first)
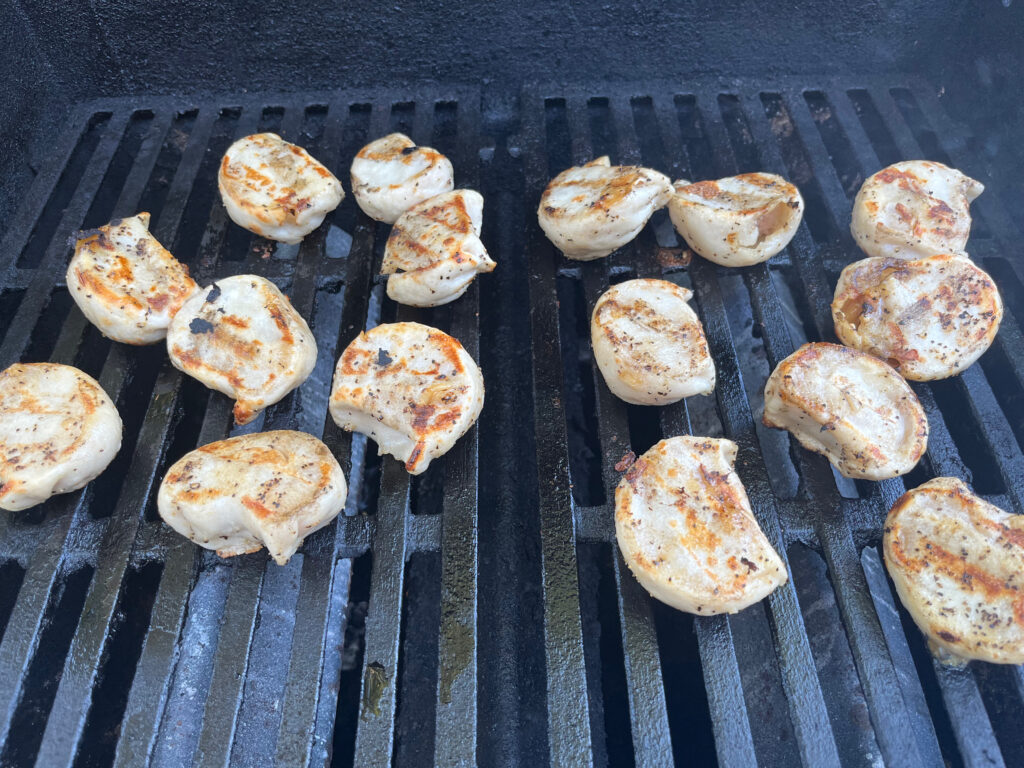
    Step 9 - flip to sides and brown
    Step 12 - place into glass serving bowl
    Step 1 - pre-heat Grill and spray with a LOT of non-stick
    Step 4 - Dumplings in Bowl (and prep with EVO, etc.)
    Step 7 - Flip each minute - round side down
    Step 10 - Flip to other side
    Step 2 - Sauce Prep (optional add hot sauce)
    Step 5 - toss dumplings with EVO - Salt and Pepper
    Step 8 - keep flipping a couple more times
    Step 11 - a couple more flips to ensure grilled consistency
    Cut and Sauce (Enjoy)

    Cleetus “American Flag” Edition

    posted by:  andy burger, fathers day, 2022

    an all-American modification

    I was fortunate to have acquired a dune buggy that the builder took much care and thought into every build detail – originally built in 2012. 

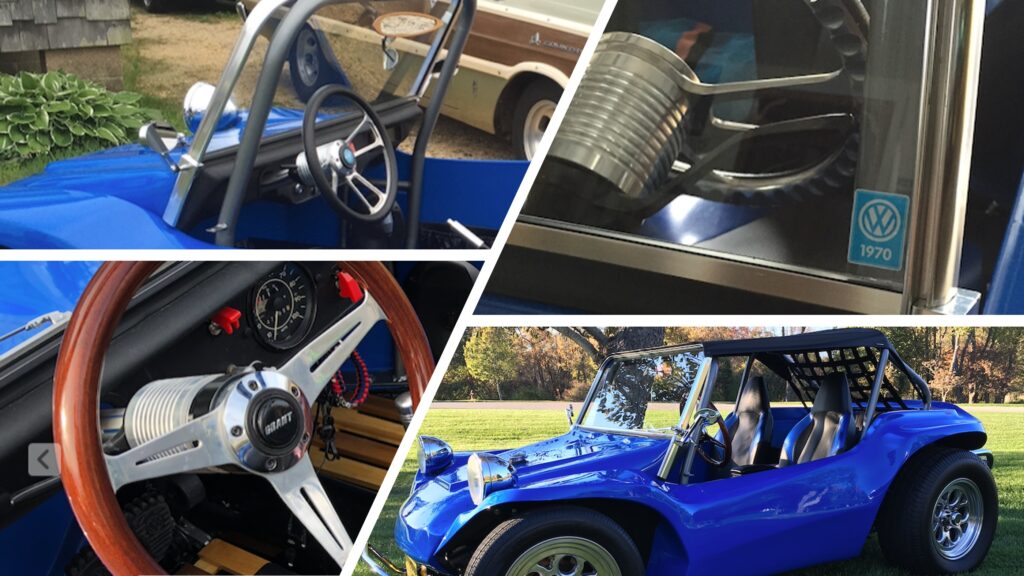
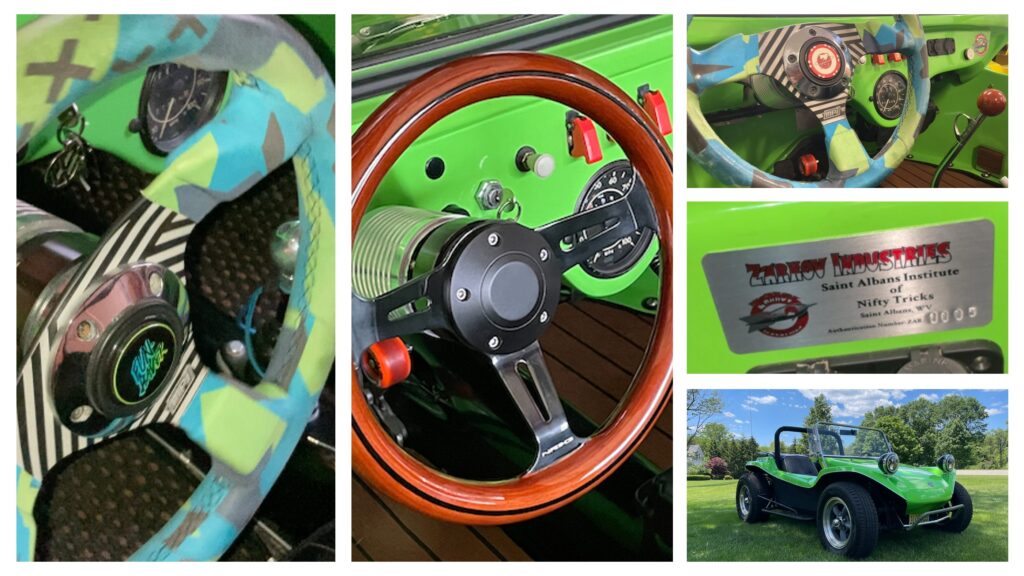
    The steering column, for example, is a one-off custom-made piece of functional artwork. Originating from a mid-60’s VW Beetle column, only the column core remains from that donor part.  A cannibalized VW turn indicator was added to a custom machined 3.5” aluminum hub – adapted for both 5 and 6-bolt steering wheel types.  The original column was painted to match the buggy body color Nassau Blue: PPG 14779.  A custom vented aluminum sleeve was installed over the column and just shows a trace of that blue through the vents.

    When I originally acquired the buggy in early 2015, one of the first things I added was a quick release steering wheel adapter and changed to a wooden 5-bolt Grant steering wheel.  The adapter pulled back the wheel an additional 2.5” into the cockpit.  Over the years, I’ve played with a few different steering wheel combinations, but they all have utilized the quick release setup and extra space, until now…

    My body swap, done during COVID in 2020, to the current Lime colored Berrien Nostalgia was completed without changing much of anything of the core build of the original buggy.  ACME Car Company started numbering Nostalgia bodies, and this one is proud to be number 00001 – the very first tagged nostalgia to come out of the shop.

    A few other things were modified to account for the new body, but one of the things I didn’t change was the trace Nassau Blue paint that you can still see on the column and can be seen through the column sleeve vents – as an ode to the original build.


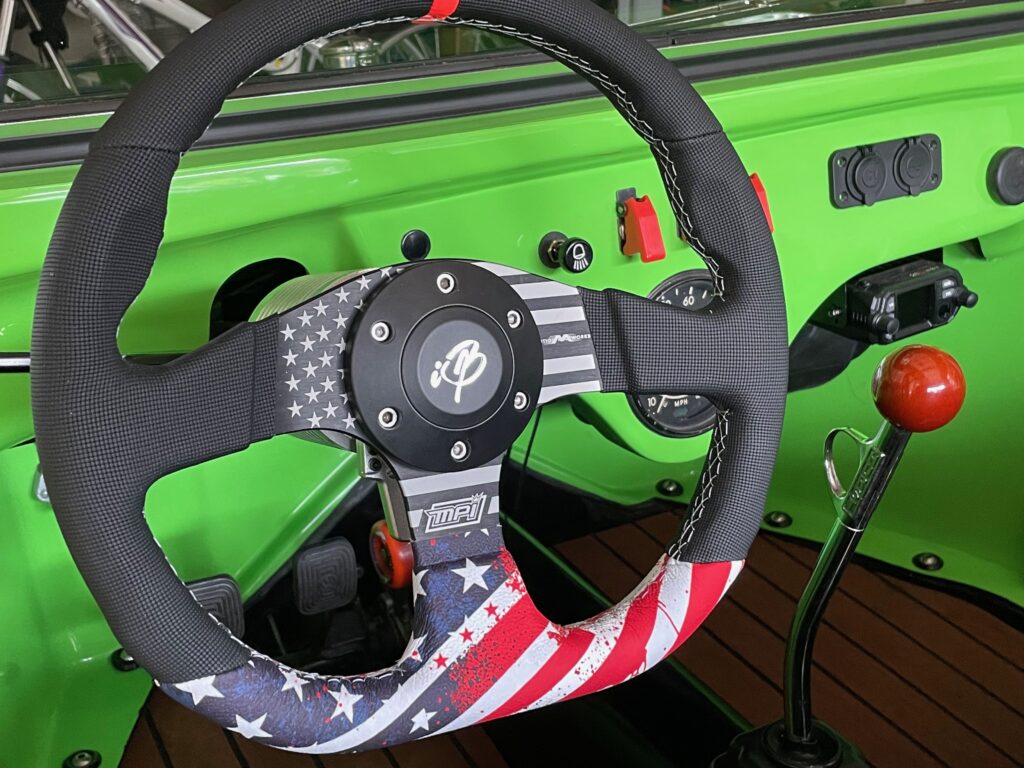
    This recent steering wheel modification/addition to my buggy is building on the continuation of the history of this vehicle.  When I purchased the MPI – Cleetus “American Flag” edition steering wheel during the Memorial Day holiday this year, I did some research on various stories about thefts of components.  For example, knowing that in VW circles, things easily removed are high theft items, e.g., original wheel trim rings, tail light housings (67’s and earlier), trim rings around head lights, etc., etc. AND steering wheels with quick releases that take a second to remove.  Quick release steering wheels deters the theft of your buggy/car, but make it easy to steal your steering wheel.  A number of discussion forums talk specifically about thefts of steering wheels that simply have a quick release.

    So here is “iBuggy” introducing mods & additions that check off the following:

    • Having to install the MPI Cleetus “American Flag” edition steering wheel without a quick release;
    • Having the convenience of a removable steering wheel without having to remove it but still retaining the extra couple of inches into the cockpit area; 
    • Still having the ability to be a circus contortionist to work under the dash on the driver’s side without having to remove the steering wheel;
    • “deter”, with an additional adapter lock, the ability to manually remove the steering wheel; and
    • “deter” theft of the buggy generically by raising the wheel and locking it in that mode while parked if needed.

    The changes from before to after are straight-forward.  Since the original machined hub was built to accommodate both 5 or 6 bolt steering wheels or adapters (most today are 6-bolt), the NRG tilt adapter (with lock) was the answer for all 5 points above.  Removing the original 5-bolt quick release adapter I purchased in 2015 and installing this new 6-bolt NRG tilt adapter is all that it took to safely mount the Cleetus “American Flag” Edition MPI Steering wheel on my buggy with a custom iBuggy “iB” chrome logo on the horn button.

    There a many different tilt up adapters for steering wheels on the market, some cheap, some very expensive.  But, this NRG model has the factory lock included and priced midrange for quality craftsmanship and a very solid feel.  I was able to get this for under $200 (list price $269).  Cheaper tilt adapters can be found on Amazon without the locks for $50 to $75 dollars.  You can spend upward of $500 for higher-end tilt adapters from Bell, etc.

    about this dune buggy

    What you are seeing is a dune buggy known as a Zarkov.  “What is a Zarkov”?  Well, that’s easy.  Dr. Hans Zarkov (aka Joseph Wheeler) from West Virginia, is arguably one of the best fabricators, fiberglass-men, paint, and mechanics to ever build a dune buggy.  This one-of-a-kind buggy was Number 5 (commissioned in 2012) in Joe’s buggy build history.  And to this day, 20 other Zarkov’s are in existence. 

    Buggy Life with Headsets and a Radio

    posted by:  andy burger, july 26, 2021

    iBuggy.Life with intercom headsets – a new setup and full review

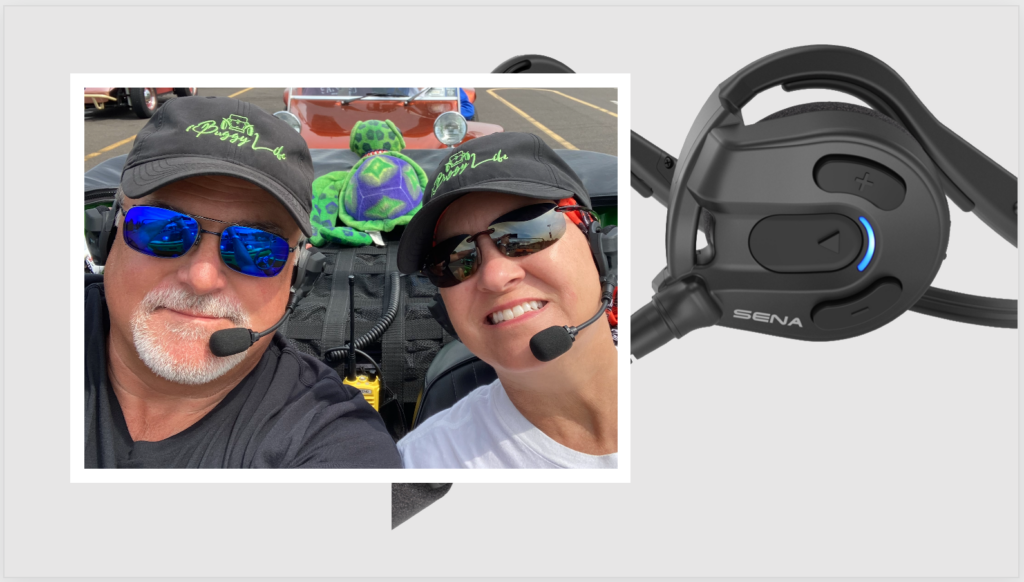
    Going to do a review on a new headset / radio setup situation that I used in West Virginia and at Manx at the Glen this past one full week. My wife and I drove ~600 miles in a buggy during these two trip destinations….

    For those of you that tried to listen to me leading the covered bridge run at Carlisle this past May and my radio was awful to those that heard me at the Glen relaying info from Lead to Sweep on runs at the Glen – it most definitely was night and day difference.  For this past week long trip, my wife and I used a new Bluetooth intercom system in tandem with the radios for club channels.
    To start with, I change technology often – its part of what I have always done for a living. Technology evolution shifts on 18 to 36 month cycles, its ever changing. Radio equipment maybe not as often, but most technology does. I had been using a wired intercom / radio setup from Rugged since 2016. Rugged makes some great stuff, and as many of you know they are wireless with a lot of their equipment. However getting into a fully wireless setup in a buggy with Rugged gear comes with a high price tag in comparison to what I have now in 2021.

    After the radio issues I had at Carlisle I took inventory of what I needed to have and what I wanted to have when driving in the buggy with my wife. Headset intercom is a must first and foremost. The radio clarity and compatibility with the headset as a driver is critical, especially leading a run or relaying information when the group gets spread out.
    So I started thinking, there must be a better way.  As an earlier biker, I usually will pop into a Harley store if I drive by one. The little light bulb in my head went off and I thought about riders using headset intercoms when riding in groups, in the 80’s when I was a rider, no such thing existed.  Sure enough in the Harley store, they have a plethora of helmet / headset / intercom options (90% of which are wireless).

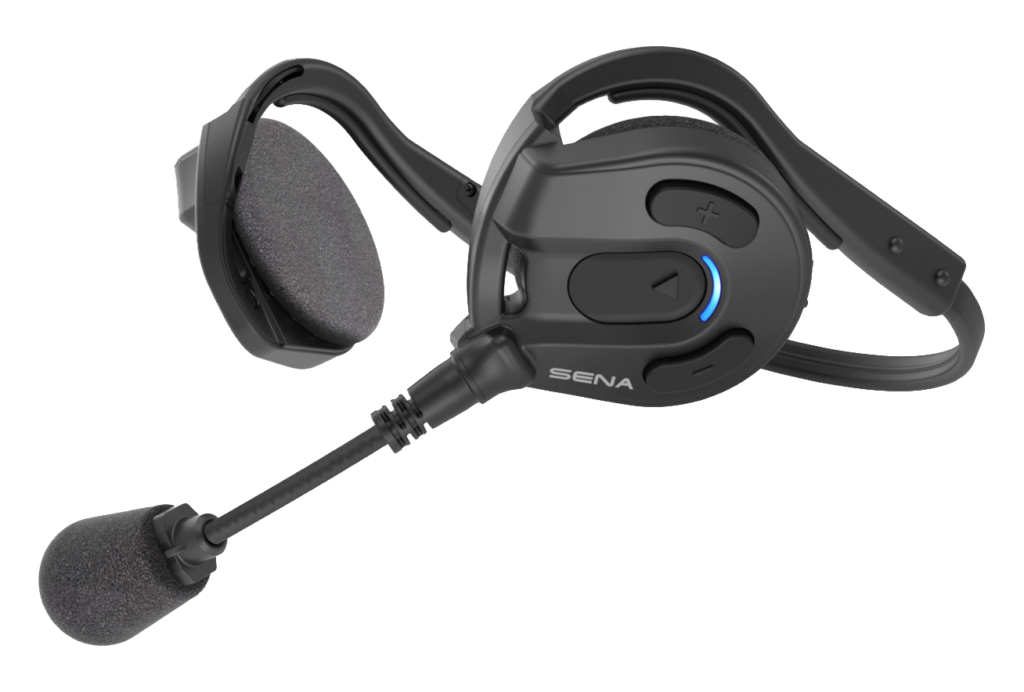
    My first “need” is intercom setups. So I looked at the Harley half helmet “behind the head” wireless intercom headset with boom mic (Harley store in New Jersey, they were $199 each, but I’ve seen them for as low as $150 at others). So I started doing my research on this solution – The company that makes them for HD is SENA – The non-Harley branded version is called the Sena Expand Boom Headset. This uses both Bluetooth 3.0 and Wireless Intercom protocols to transmit and receive voice and audio data. You can actually pair up to 4 headsets together in an intercom group for a range of up to 900 yards apart and you only need the headsets, no other radio gear, no wires, nothing. I need to try these out, gotta give it a go.

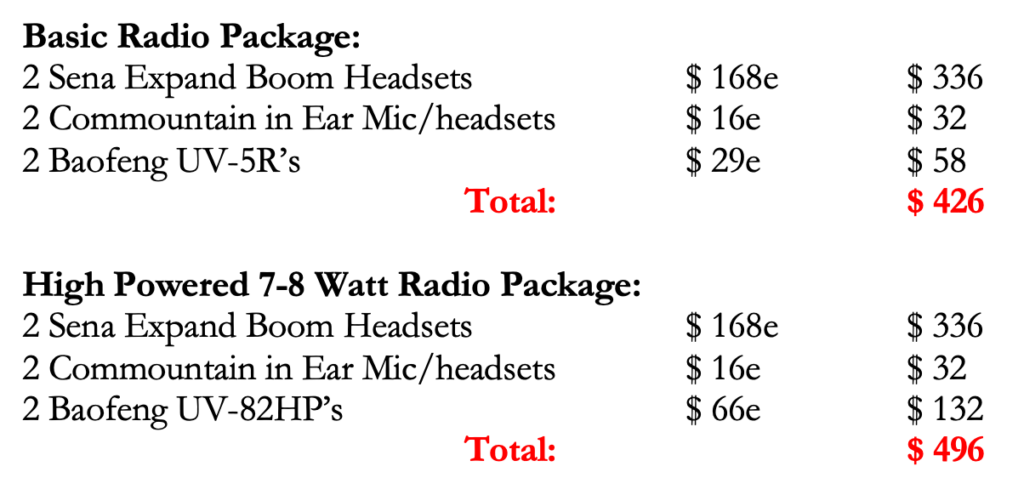
    So I went to Amazon (best return policy on the planet) and ordered two Sena Expand Boom headsets for $168 dollars each, free shipping.  Two days later, I was testing how easy or not so easy they are to use. Here is my Pros and Cons of these Sena headsets:

    PROS

    1. Light as a feather, comfortable, and they go behind the head. Padded over the ear foam protectors are easy to wear for longer periods
    2. Clear transmission, sound quality is great
    3. Audio quality for music streaming from your phone is EXACTLY like any Bluetooth stereo airpods or good stereo speaker output.  It does not sound like a mono AM Station as the other over the ear headsets relays for audio
    4. They do NOT block out all noise, you can still hear things you need to hear but the intercom mode for voice is crystal clear without really blocking external sounds. Some over the ear setups, you feel like you are in a tunnel and miss outside noise situations (some of which are illegal in many states).  These are small and sit on top of the ear so you can interact with the outside world without removing them if needed
    5. They feel like they shouldn’t stay on but they do, no adjustment is needed on how large of a head you may or may not have
    6. Multi-Day battery life, 10 hour continuous talk time.   I purposely didn’t charge them on the first night after an entire day of usage in the buggy.  After the full first day, I still had over 75% battery left and after the second day still over 75% left (you don’t know the actual percentage left, just a range).  The Ranges are either 100%, 75 to 100%, 50 to 75%, 25 to 50% and 0 to 25% based on the number of LED blinks when you power the units on
    7. You can pair your cell phone to one of the headsets and share the same music by streaming to the other headsets via the intercom/music sharing option built into the Sena configuration
    8. And, since you can pair your headset to your cellphone, the headset is a fully functional phone wireless headset for making and receiving phone calls as with any Bluetooth phone headset
    9. You don’t really need to turn them off for short periods if you stop the vehicle for some food, fuel, or a scenic overlook. Keep them powered on, the battery will not go down much if at all in on/standby mode
    10. Quick charge times when you do charge them up, standard micro USB cable on any phone charger block. Supposedly can be fully charged in 2 hours.  I felt it was a little longer, but if you leave them overnight before a cruise the next day, you are golden

    CONS

    1. Bluetooth understanding. You need to know how to pair these devices together and with your phone if you want to do that as well.  You really need to feel comfortable with wireless technology to quickly get them operational when you power them on
    2. There are just a few buttons on the units, multi-function button press combinations are different for what function you are doing (you need to be comfortable with using the technology)
    3. When you press the button the button presses – ham hands or pressing it like a push button on a soda machine you can damage the units. They are light and moderately on the delicate side, but well-built and water resistant.  Just press them and don’t man handle them.  This is a con, because you just need to be aware
    4. Activating intercom time on initial power on to speaking can be inconsistent. Nothing longer than a minute or so, but you need to make sure they are active when you start.  I found that once your headsets are paired, intercom activation between both headsets was almost instantaneous if my headset wasn’t paired with my cellphone.  The reason being is that the headset will try to connect with the phone first and intercom headsets second.  Either way, the time will be relative on what you think is quick or taking too long.
    5. Although once your headsets are intercom paired, you may or may not have to do this but, if they lose intercom pairing to each other, you need to go through the sequence again. Not time consuming but spend a few minutes to make sure the intercom is activated before you start driving, again (see Con number 4 above).  However, this is really no different than getting ready to ride in a group.  Take the time and get ready to start, be prepared and ready to go.  This is only a con, because re-pairing is not so easy to do once you start driving.  Take the time to make sure your headsets are intercom connected
    6. The Mic needs to be close to your lower lip, if it goes lower or falls to the side too much, the mic may pick up external sounds. Test your proper mic placement

    So now I’ve been talking about the intercom mode on two wireless headsets that totally gave my wife and I an amazing experience in the buggy without blocking out all external sounds of the road and trip in full….  What did I do about the Handheld radio and how did I pull off clear communications from one event to another ??

    I simply changed my radio headset/Mic combination

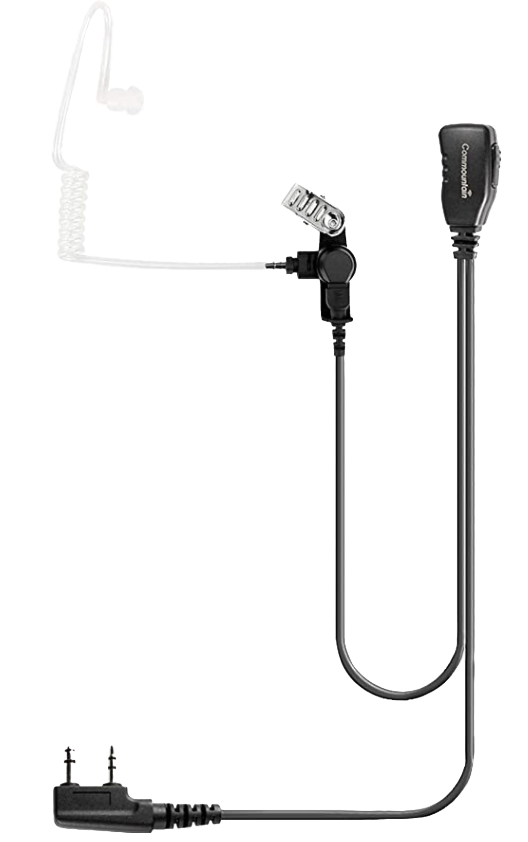
    I bought an inner ear tube earpiece that went into my ear (UNDER the Sena Over the ear Headset), and a clip on mic to my shirt collar that I would raise to press/speak.  The cheap ones are cheap.  I spent 16 dollars for this one, not the 4 dollar version ones.  Commountain makes GREAT well made high quality radio accessories.  I used both of these during the trip.  The inner ear one in West Virginia and the Speaker/MIC combo at the Glen (I had this one already and had lost my earpiece in travels of the other one).  The MIC/Speaker was clipped to my collar and I was still able to hear even with the Sena’s over my ear for intercom.  Click on the photos for a direct link for more information and or purchase options.

    SENA Expand Boom
    OPTIONAL Commmountain Handheld Speaker/MIC
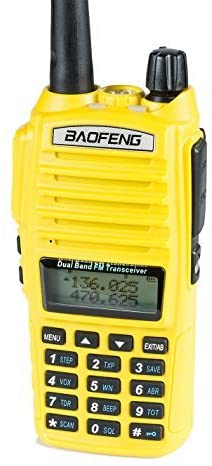
    Baofeng UV-82HP 7-8Watt
    Commountain Tube Inner Ear MIC/Speaker

    So basically I NEVER combined the radio with the intercom headsets.  I simply used the radio as a separate unit but still wore the Sena headsets.

    In West Virginia, my wife did the same (we had two radios active in the car at the same time), so she could listen to the radio traffic as well as talk with me on the intercom.   By the way in small groups we play trivia over the radios – the lead has a list of trivia questions and it’s a lot of fun.

    The clarity of my radio at the Glen was the Baofeng UV82HP 7-8 Watt new radio and the Commountain Handheld Speaker/Mic (although not listed in the price list below).  I had lost the tube portion of the inner ear headset in travels from West Virginia – However, when I ride alone, I don’t use an inner ear headset.  I only use the Speaker MIC and I keep it clipped to my shirt collar to hear and easily key the Mic to speak.  The Commountain Speaker is heavy duty, loud and clear and only 22 dollars.  

    In Carlisle, my radio was older still worked but the MIC was a cheap one and my voice came across really broken up at times.  I’ve only ever used  Baofeng radios (I have UV-5R and UV-82HP) ones even when I had a wired Rugged Intercom and wired Rugged Headsets in my old setup. 

    The Baofeng’s are inexpensive and very good.  The UV-5R is $29 bucks, the 82HP is 7-8 watts and only $66 dollars.

    So here is the summary – One Buggy, Two People, and both want to talk easily and listen and contribute to Radio traffic:

    Now obviously you don’t need two radios, but its always better and inexpensive if you go with Baofeng to be prepared for any scenario and for backup purposes …. and if you are playing radio trivia and you want your passenger to participate in this setup.

    Enjoy